How to Create a Facebook Business Page
What Is a Facebook Business Page?
Facebook Business Pages are public-facing accounts that allow local businesses, international brands, and public figures to engage the Facebook community.
Once you've created a Page for your business, you'll be able to publish content, share important company updates, promote events and new releases, and otherwise connect with your audience via the largest social network in the world.
A Facebook Business Page will also give you access to Facebook's robust advertising platform and Facebook Shops—two amazing tools you can use to grow operations.
How to Create a Facebook Business Page
Facebook Business Pages are easy to create. Follow the simple five-step process below to get your company's Page up and running in less than an hour.
Step 1: Create a Page
The only people who can create and manage Business Pages are those who already have personal profiles. So, first, log into your personal Facebook account.
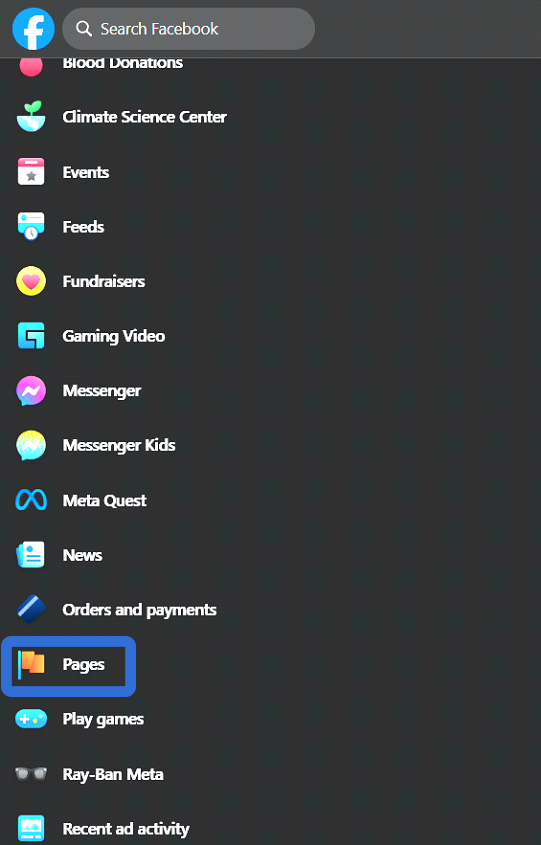
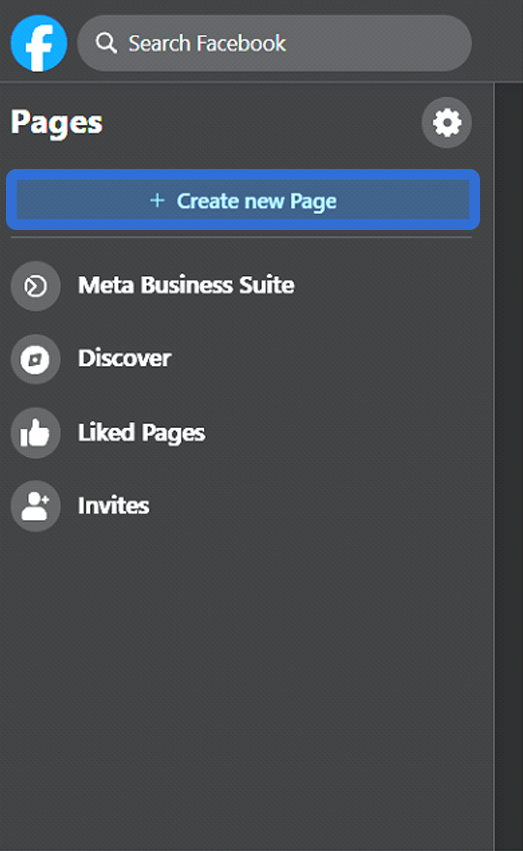
Once you're logged in, click "Pages" in the left-hand menu, and "+ Create New Page".
Then enter your business name, up to three categories, and a bio. You should see the Page Preview screen update in real time as you input information.
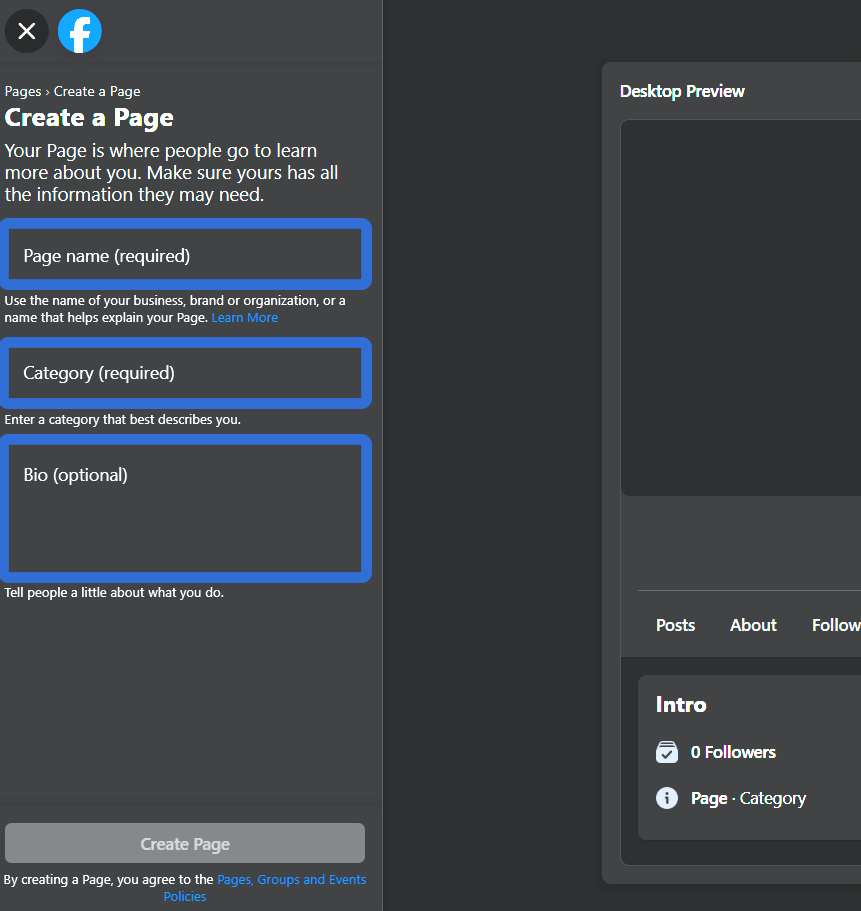
When you're done, click "Create Page".
Step 2: Add Your Pictures
Next, upload a profile and cover photo for your new Facebook Business Page.
If you're not familiar with these terms, your profile photo is the image that appears next to your business name on your Page. It should be 170 x 170 pixels. Your cover photo is the image that stretches across the top of your Page and should be 1640 x 856 pixels.
Use high-quality images to improve your Facebook Business Page.
Most businesses use a logo or another recognizable image for their profile photo. Pro tip: use the same profile photo across all of your company's social accounts to ensure consistency.
Your cover photo should represent the purpose and/or theme of your business. For example, a picture of a product that you sell, an employee at work, or a happy customer. Make sure that it's a quality image that aligns with your brand.
When you're happy with your profile and cover photos, click "Save".
Step 3: Edit Your Page Info
You've created your Facebook Business Page and uploaded a couple of photos. Now it's time to add your business details. That way potential customers can quickly find your company's address, website, contact information, hours of operation, etc.
The easiest way to do this is to click the gray "Manage" button near the top of your Page. Then scroll to the "Set Your Page up for Success" menu on the following screen. To add details, simply expand the "Provide Info and Preferences" section.
Add important details to your Page like your company' website and location.
Don't forget to set your username and add an action button!
To set your username, AKA your Page's URL, click your account icon in the top right corner of your screen. Choose "Settings and Privacy", then "Settings" in the drop-down menu. Click "Edit" in the username section and choose a custom username for your Page.

Change your Facebook Page's URL so it's easier to find.
Action buttons make it much easier for customers to call you, place an order, book a service, or complete some other activity that relates to your business.
Scroll to the bottom of the "Provide Info and Preferences" section that you were just working in. Click "Add Button". Then choose the action that suits your company best.
Action buttons will help you connect with customers in meaningful ways.
We should mention that your Page's business details can be changed at any time. Simply re-click the gray "Manage" button to make edits, add new information, and more.
Step 4: Make Your First Post
Your Facebook Business Page is almost ready! Before you invite your audience to follow you on the platform, take a few minutes to post compelling content. Here are a few ideas:
- A Welcome Post: Share information about your business, why people should follow your page, and the kinds of content you plan to publish.
- Behind the Scenes Photos: Share pictures of your team building products, performing services, etc. People love to peek behind the scenes!
- Funny Memes: Everybody loves a good meme. Share a few that relate to your business. Just make sure that each image aligns with your brand.
- Links to Written Content: Make your Page a valuable source of information by sharing links to interesting blog posts, ebooks, and the like.
Post things that your audience will enjoy and keep posting on a regular basis.
To create your first post, go to your page and click the box that asks "What's on your mind?" Then type your thoughts into the pop-up menu that appears. To make your post more memorable, consider adding an image, GIF, or feeling to it.
When your post is done, click the blue “Post” button at the bottom of the pop-up window.
Step 5: Invite Your Audience
Now that your Facebook Business Page is loaded with content, it's time to show it to the world. First, invite your personal Facebook friends to follow your new Page. All you have to do is scroll to the bottom of the "Set Your Page up for Success" menu that we mentioned earlier.
Find the section called "Introduce Your Page" and click the "Invite Friends" button. Then follow the three-step directions that appear in the pop-up menu.
Promote your Facebook Business Page by inviting your friends to follow it.
We suggest promoting your new Facebook Business Page in other ways as well. Post about it on your company's other social profiles. Email your subscribers and ask them to give you a follow. Add "follow us" logos to all of your brand's marketing materials.
By setting up your Facebook Business Page for success, you’ve opened the door to more customers and leads!