How To Import Recipients
When importing new recipients using the Email Marketing app, you’ll have the option to import new recipients through our easy to use import wizard. The file import process has two parts: First, you’ll prepare your spreadsheet of contacts outside of the Email Marketing app and save it as a CSV file. Next, you’ll use our import wizard to upload your file and add your contacts to your recipient list. Below, we will walk you through building and importing recipients.
Prepare for Import
- In a spreadsheet program like Excel or Google Sheets, open your blank worksheet.
- Note: You can also download our sample template and delete the sample data.
- Create and label six columns starting with FirstName. Next to your FirstName column, label additional columns for LastName, Email, Address, Phone, and Birthday.
- Note: They must appear in that order with the exact spelling, whether there will be information in the columns or not.

- Paste your contacts' information into the relevant fields in the spreadsheet - each row must have an email address.

- Save the file in CSV format. This option can usually be accessed from the File menu in your spreadsheet program, labeled as "Export as .CSV" or "Download as .CSV". Different spreadsheet programs will vary a little bit.
- Note: Need some help saving your spreadsheet file in CSV format before you import? Check out these CSV tips from Excel and Google Sheets.
- Nice job! Now that you've prepared your CSV file, you're ready to upload your list.
Upload List
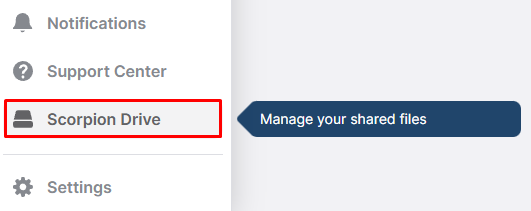
- While in the platform, open up Scorpion Drive by clicking on the drive icon in the lower left corner.
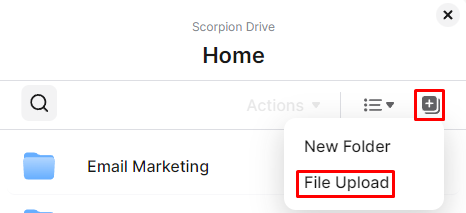
- Click on the icon in the top right corner of the Scorpion Drive window and select File Upload, then select the Contact List that you want to upload.
- Now that you've uploaded your list, you're ready to import your contacts.
Import to Recipients List
- Navigate to the Email Marketing section by selecting the Marketing Suite in the left-hand navigation and clicking on Email Marketing in the upper navigation. You can also go straight to the app and get started.

- Click on Contacts in the top navigation.

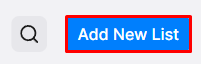
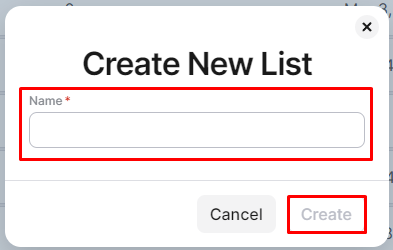
- Click on Add New List in the top right corner.
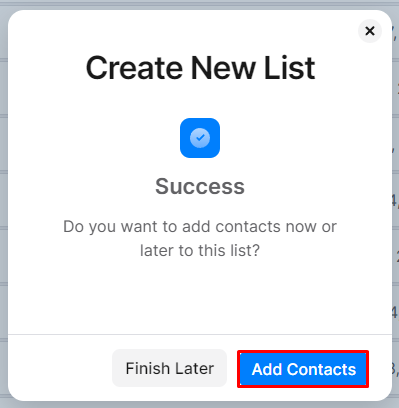
- Name your list and click Create.
- Click Add Contacts.
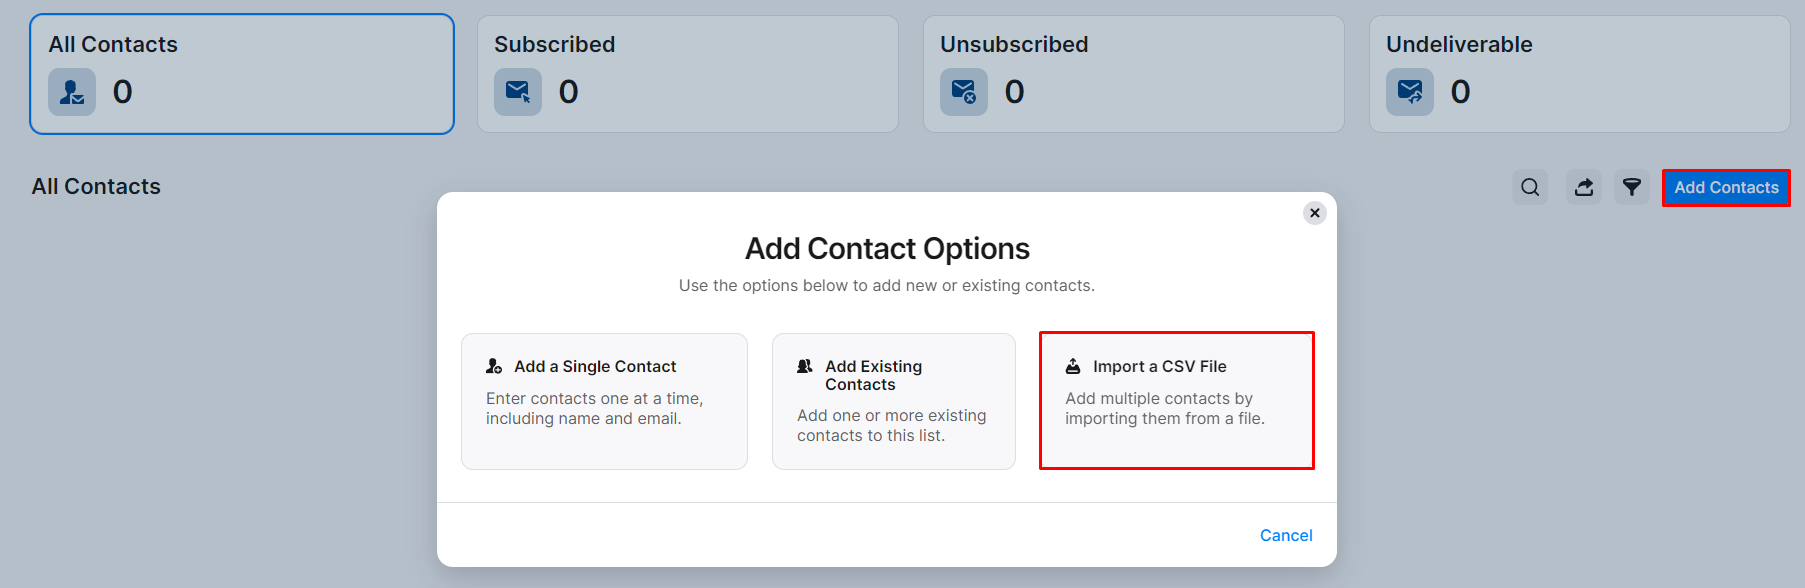
- To import your contacts, click Import a CSV File.
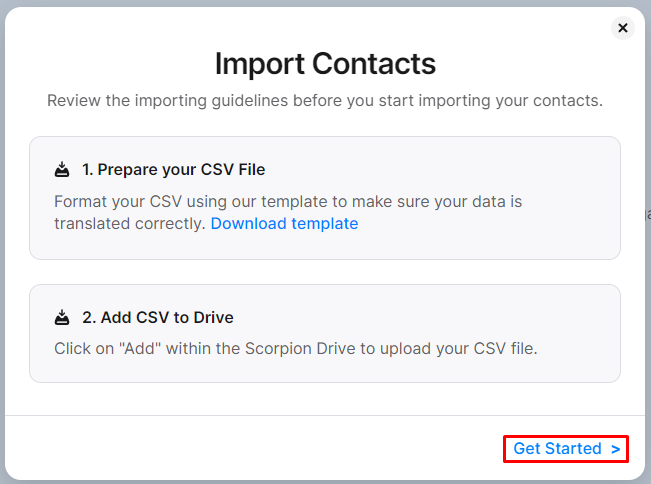
- Click Get Started, select the file you previously prepared, and click Add.
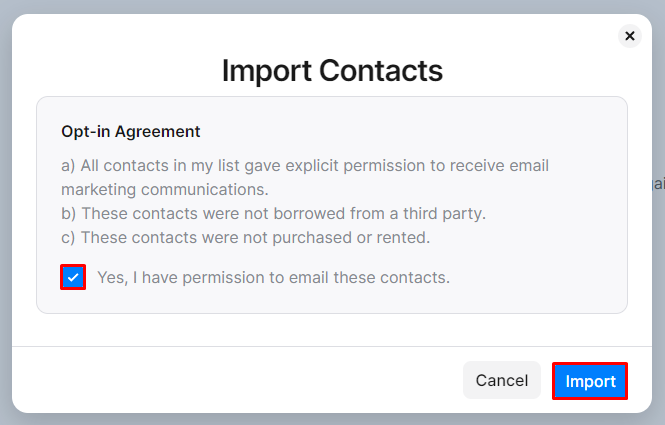
- Check the box if you have permission to email these contacts and click Import.
- That’s it! Your new List has been added.
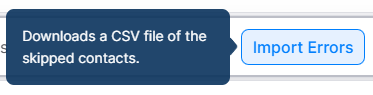
- Note: You can see the status of your import under the Import History tab. If there are any issues or duplicate entries, you can click Import Errors to download the file of skipped contacts. In order to add these contacts to your list, you will need to fix the errors and import that file to the list you created.