How to View and Edit Scheduled Posts
The Social Media App allows users to schedule posts several days, weeks, or months in advance. If there are multiple people in your company responsible for publishing content, you can review your upcoming posts to ensure everything looks good and is error-free. This article covers how to do that, as well as how to make any changes to these scheduled posts.
- Navigate to the Social Media section by selecting the Marketing Suite in the left-hand navigation and clicking on Social in the upper navigation. You can also go straight to the app and get started.

- From the Social Media home page, select My Posts in the top navigation. You will be taken to the list of scheduled and published posts.

- Any posts scheduled for future publication will be labeled Scheduled.
- Note: You can view only Scheduled posts by selecting the Scheduled tab in the top section or using the filter button to filter by post status.

- Select any post in the list to display a preview.
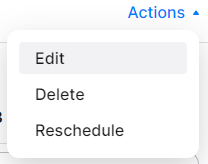
- If you wish to make any changes to the scheduled post, click on the Actions menu and select Edit.
- Note: You can also click on the kebab menu to the right of the post in the list view.
- You will be re-directed to the Publishing Wizard, where you can edit anything about the post, including which profiles it is connected to, the time & date of publication, text, and media assets.
You can refer to the "How To Publish A Post To My Social Media" help article for more information about the Publishing Wizard workflow.